
C# 單元測試
參考:
建立測試程式
先建立測試程式
using System;
using System.Collections.Generic;
using System.Linq;
using System.Text;
using System.Threading.Tasks;
namespace UnitTest {
public class Sample {
int a = 0;
int b = 0;
public Sample(int x, int y) {
a = x;
b = y;
}
public int Add() {
return a + b;
}
public int Add2() {
return a * 2 + b * 2;
}
public int AddAnother (int x) {
return a + b + x;
}
}
}
建立測試單元
在程式視窗中按滑鼠右鍵,選擇「建立單元測試」

底下全部使用預設值。
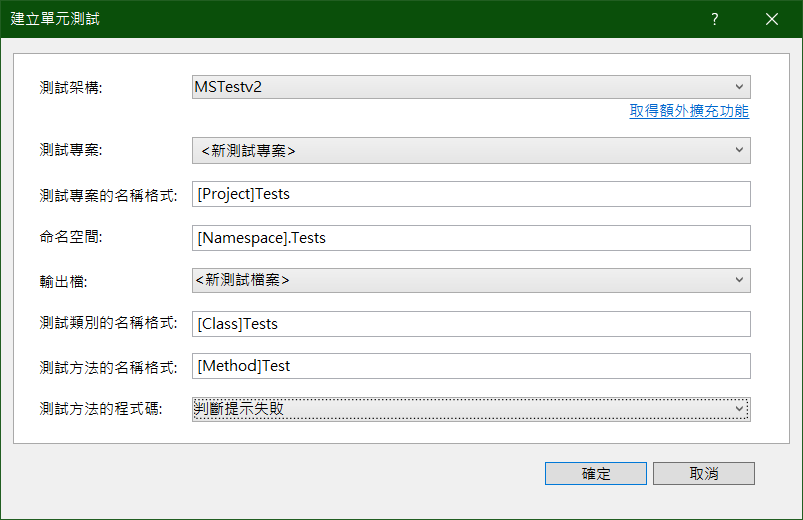
按下確定後,就自動產生了測試程式,每一個函式也自動產生自己的測試單元了,真的很方便。
using Microsoft.VisualStudio.TestTools.UnitTesting;
using UnitTest;
using System;
using System.Collections.Generic;
using System.Linq;
using System.Text;
using System.Threading.Tasks;
namespace UnitTest.Tests {
[TestClass()]
public class SampleTests {
[TestMethod()]
public void SampleTest() {
Assert.Fail();
}
[TestMethod()]
public void AddTest() {
Assert.Fail();
}
[TestMethod()]
public void Add2Test() {
Assert.Fail();
}
[TestMethod()]
public void AddAnotherTest() {
Assert.Fail();
}
}
}
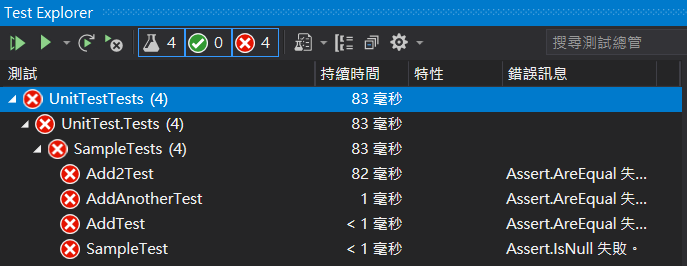
什麼事都不做,先試看看由功能表的「測試」去執行所有測試。

結果是可以想像,全部失敗。 :)
撰寫測試程式
紅色是加進去的測試程式。
using Microsoft.VisualStudio.TestTools.UnitTesting;
using UnitTest;
using System;
using System.Collections.Generic;
using System.Linq;
using System.Text;
using System.Threading.Tasks;
namespace UnitTest.Tests {
[TestClass()]
public class SampleTests {
Sample sample = new Sample(10, 20);
[TestMethod()]
public void SampleTest() {
Assert.IsNotNull(sample);
}
[TestMethod()]
public void AddTest() {
int result = sample.Add();
Assert.AreEqual(result, 30);
}
[TestMethod()]
public void Add2Test() {
int result = sample.Add2();
Assert.AreEqual(result, 60);
}
[TestMethod()]
public void AddAnotherTest() {
int result = sample.AddAnother(70);
Assert.AreEqual(result, 100);
}
}
}
執行測試
執行測試成功!

手動加入測試專案
以上是系統自動加入的功能,底下要手動加入。
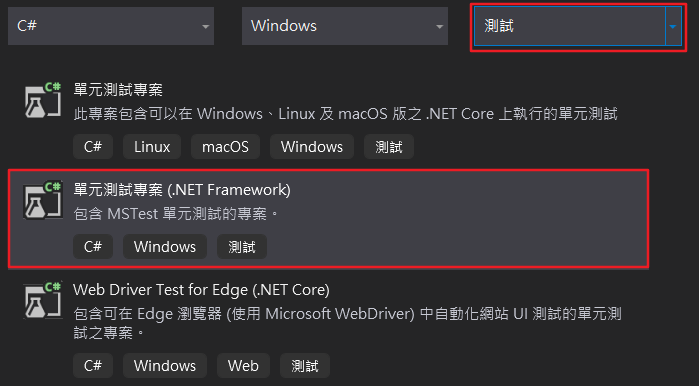
首先新增測試專案如下,原始的程式和之前的一樣。
位置選擇要測試的專案,方案要選「加入至方案」。

這是自動產生的測試檔。
using Microsoft.VisualStudio.TestTools.UnitTesting;
using System;
namespace UnitTestProject1 {
[TestClass]
public class UnitTest1 {
[TestMethod]
public void TestMethod1() {
}
}
}
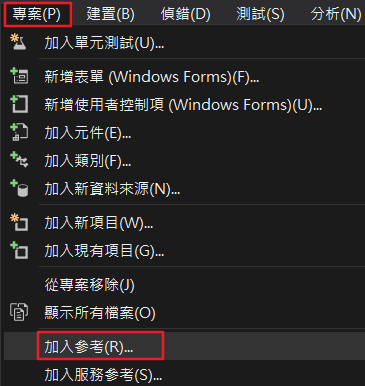
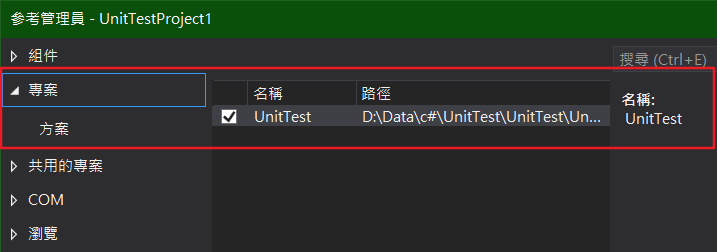
在主功能的專案中選擇「加入參考」。
在參考管理員的專案中找到要測試的方案,勾選後按下確定。
底下是手動加上紅色的文字,建立物件並測試 Add 函式。
using Microsoft.VisualStudio.TestTools.UnitTesting;
using UnitTest;
using System;
namespace UnitTestProject1 {
[TestClass]
public class UnitTest1 {
Sample sample = new Sample(20, 30);
[TestMethod]
public void TestMethod1() {
Assert.IsNotNull(sample);
}
[TestMethod]
public void TestAdd() {
int i = sample.Add();
Assert.AreEqual(i, 50);
}
}
}
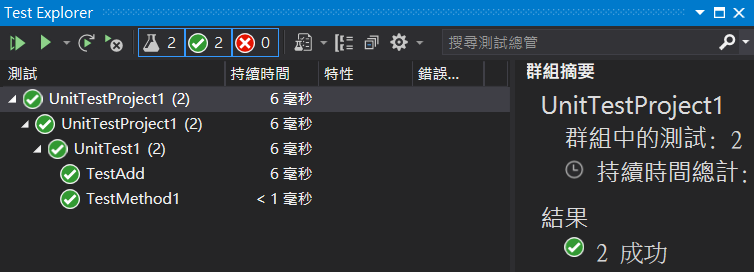
執行測試成功!
- 瀏覽次數:7852

發表新回應